Free shipping on orders over $50!*Restrictions Apply. Free shipping applies within the US and UK only. Not valid on TempestOne.
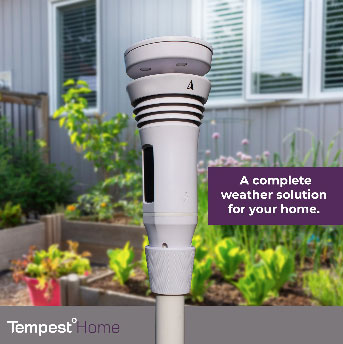
Tempest Weather System
Centered around the Tempest Home Weather Station and the powerful Tempest app with a guaranteed better forecast, the Tempest Weather System is the ultimate tool for managing your smart home, garden and all of your weather-driven decisions.
TempestOne is a platform solution that empowers your organization with decision tools informed by accurate weather observations and forecasts. Leverage the massive curated data set generated by the Tempest Network and our exclusive AI-powered Nearcast™ Technology. The result is a premium product suite with unparalleled accuracy in situational awareness and short-term forecasting designed to help any size organization. Our solutions guarantee you and your customers save water, energy and money.
Patented technology providing accurate point-specific weather data everywhere you need it.
Get to know our Nearcast™ technology — patented technology designed so you understand the weather that
happened yesterday, observe what is happening now, and better predict what the future will bring, all with
guaranteed accuracy.
“I have been working with these guys for years now! With lots of hard work and timely communication, they made sure they delivered the best to me. Highly recommended!“WOW!!! That’s what I call great customer support and standing behind your product.”
Andrew – Verified Owner July 2019
“This system is ridiculously easy to set up, it delivers all the weather information an amateur meteorologist could wish for, and it’s supremely accurate to boot.”
TechHive Review June 2020
“I meant to also give a shout out to the amazing WeatherFlow team. They said they would deliver us a great product and they did.”
Nels – Verified OwnerWF Community, June 2019
“Temperatures have been spot on, wind readings are responsive and accurate. The lighting detection is unbelievable – you can track storms heading in and leaving with just this feature alone. Highly recommend the new Tempest.”
Brad – Verified OwnerMay 2020
“A godsend for offshore fishermen. Their forecasting gives the most accurate and location specific information available anywhere”
WB, FishWeather
“As an old engineer, I really appreciate the thought and care that you’ve put into your product.”
Don – Verified OwnerJune 2019
“It’s amazing how it tracks and charts rain intensity, accumulation, lightning activity and wind speed/direction, along with many other parameters. It’s truly an incredible PWS!”
Victor – Verified OwnerMay 2020
“This system is truly revolutionary. We highly recommend it to anyone who needs or wants a weather station! Well worth the investment!”
CaryFeb 2019
“Flat out awesome technology and the best weather station I have ever had!”
GlennJuly 2019
“To have this much power in one self sufficient unit is a dream come true. Plus, the neighbors all love the way it looks on the fence.”
See also our affiliate company WFn Holdings Inc aka which owns and operates the largest industrial grade private weather observing network in the world, and supplies us with exclusive data. WFn also directly serves specialized weather data users such as NOAA and the Hurricane Insurance Industry.